
Is there any example of what the temp post looks like and any associated part I need to mount the lpr onto one? I could possibly ask my fencer to make one for me.As others have pointed out in the forum, setting up an LPR camera takes time. Adjustments must be made for both day and night captures. It is more art then science in many cases.
It is something that is done over a matter of weeks or months to make the proper camera adjustments. As has been suggested by others, mount the camera on a ladder or temporary post. Then make changes to your settings for what is needed at your location for that time of day.
Night settings will be completely different depending on lighting conditions, range, B/W vs color etc. It is not set and forget if you are interested in fine tuning the camera for optimum performance under varying lighting conditions.
Take your time, record your settings and make changes to improve the image as needed.
help with IP Camera models
- Thread starter kearkg
- Start date
You are using an out of date browser. It may not display this or other websites correctly.
You should upgrade or use an alternative browser.
You should upgrade or use an alternative browser.
Alaska Country
Getting comfortable
There are a number of suggestions posted on this site. However, one idea that was posted is to use a 5 gallon bucket, insert a 2x4 perhaps 8 foot in length and secure with dirt, rock or cement. Make sure that the wind can not topple it over, perhaps a rope to some secure fitting. Test for a few days to make sure the location will work for your needs.
Others have used ladders, a camera tripod or constructed a larger wooden base structure to temporary support the camera. If the house has wood paneling then use a camera attached to a small piece of plywood. Then attach to the house using 2 wood screws to test a location. Plug small holes and add a dab of paint to repair.
Others have used ladders, a camera tripod or constructed a larger wooden base structure to temporary support the camera. If the house has wood paneling then use a camera attached to a small piece of plywood. Then attach to the house using 2 wood screws to test a location. Plug small holes and add a dab of paint to repair.

my installer should be coming around later this week to install the cameras, one thing I am a bit unsure on though is the cameras going under the eaves.
I did ask Andy about junction boxes and he sent me ones for where cameras going on brick, but he hasn't said much about the ones under the eaves.
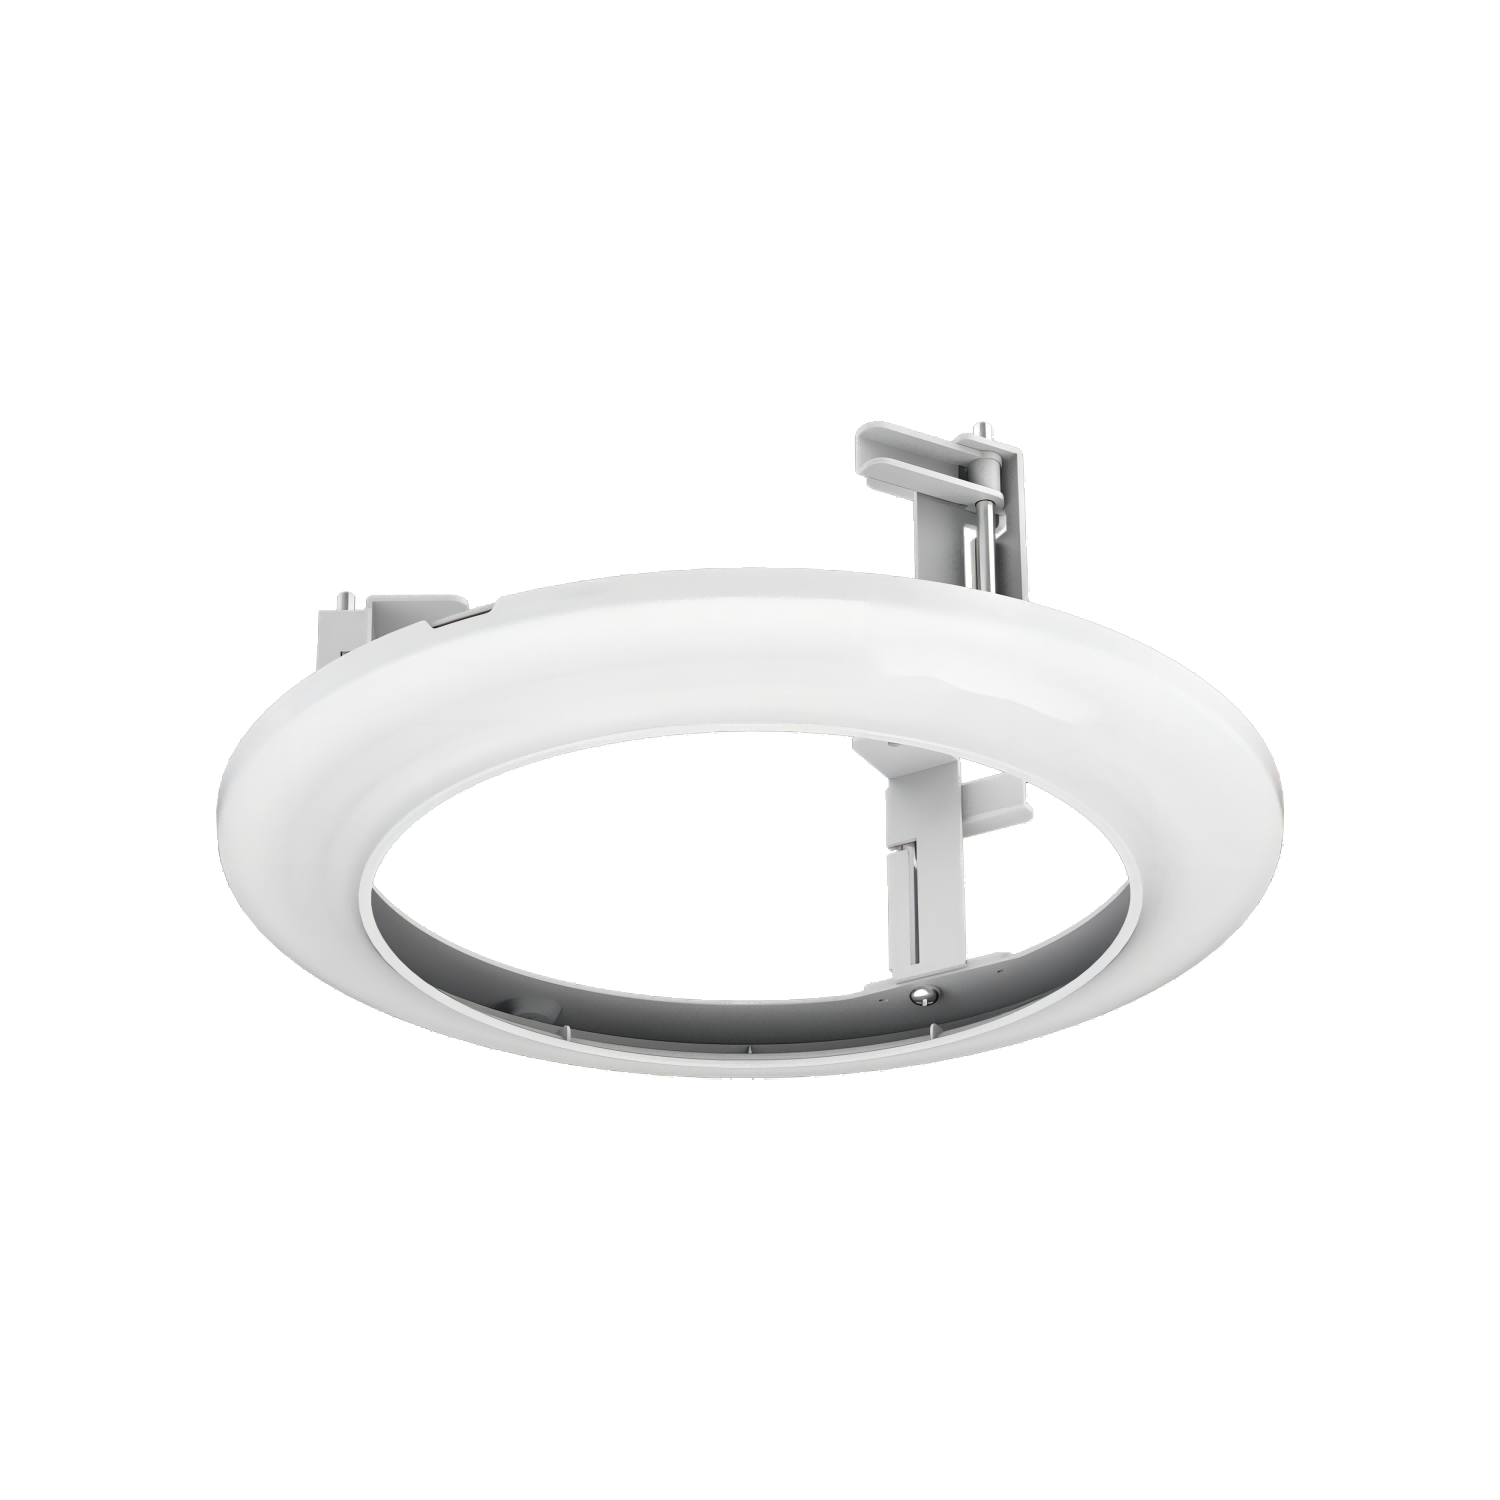
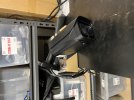
I have a IPC-Color4M-T being install onto the alfresco ceiling (attached close up pic of alfresco ceiling ) and was wondering if I still use junction box with it? the one I have is the PFA130-E, but it seems more suited to a face brick install. I can't see any in-ceiling brackets for this camera on empiretech's website.
I have a mini PTZ being installed onto the eaves and wanted to know if it needs a junction box? I saw empiretech have this one:
 empiretech01.com
Do i need a in-ceiling bracket like this? the camera weighs 2.5KGs and I'm not too sure how that is supported under an eave. I've attached a close up pic of my first floor eave here.
I did ask Andy about junction boxes and he sent me ones for where cameras going on brick, but he hasn't said much about the ones under the eaves.
I have a IPC-Color4M-T being install onto the alfresco ceiling (attached close up pic of alfresco ceiling ) and was wondering if I still use junction box with it? the one I have is the PFA130-E, but it seems more suited to a face brick install. I can't see any in-ceiling brackets for this camera on empiretech's website.
I have a mini PTZ being installed onto the eaves and wanted to know if it needs a junction box? I saw empiretech have this one:
EmpireTech PFB5310C In-ceiling Mount Bracket Suitable for PTZ425DB-AT
Quick and easy to install Easy to disassemble and maintain Safe and reliable
Do i need a in-ceiling bracket like this? the camera weighs 2.5KGs and I'm not too sure how that is supported under an eave. I've attached a close up pic of my first floor eave here.
Attachments
If you have some space above the ceiling to put cables & connections above the ceiling - then You don't need junction box nor for 34PRO nor for miniPTZ..
junction box is only needed in situations like full brick/concrete, where you can't put ethernet connectors inside..
or when you try to install those cams on vertical wall. or if you want to fully isolate the ceiling / wall...
junction box is only needed in situations like full brick/concrete, where you can't put ethernet connectors inside..
or when you try to install those cams on vertical wall. or if you want to fully isolate the ceiling / wall...
Two trains of thought
(I was typing at sane time as Steve)
1- no it’s not mandatory. As long as you can stuff the cables into a hole in the mounting surface and minimize water/moisture ingress
2- it’s cleaner and makes accessing cables and connections or swapping out cameras easier
The mini PTZ uniquely gets very hot. Very hot. Like 160 degrees+ hot.
Mine is mounted directly without the ceiling mount bracket but with the metal heat plate directly to exterior grade (marine grade?) compressed wood but if I had to do it over I’d use the bracket
160 degrees Celsius or Fahrenheit?Two trains of thought
(I was typing at sane time as Steve)
1- no it’s not mandatory. As long as you can stuff the cables into a hole in the mounting surface and minimize water/moisture ingress
2- it’s cleaner and makes accessing cables and connections or swapping out cameras easier
The mini PTZ uniquely gets very hot. Very hot. Like 160 degrees+ hot.
Mine is mounted directly without the ceiling mount bracket but with the metal heat plate directly to exterior grade (marine grade?) compressed wood but if I had to do it over I’d use the bracket
You could go pretty simple with a temporary setup. A lot of people just use a sturdy post in a bucket of concrete or a tripod stand to test positioning. The key is making sure it’s stable enough so the camera doesn’t shake or shift while you’re testing settings. If your fencer can make you a straight post with a flat plate on top, you can bolt or clamp the LPR to it. Nothing fancy is needed—just something steady that lets you move the height and angle around until you lock in the right spot.
had the installer over today and got 5 cams running ( 4 x IPC-Color4M-T and 1 x IPC-T54IR-ZE-S3).
the HDDs came up fine on the NVR.
PTZ will be done next week and I ended up getting the in-ceiling bracket.
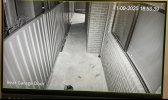
some night photos of the view I get out of the NVR.
reading some other posts, I ended up setting my encoding settings to all cameras to:
Coding strategy: General
Type: General
H.264
2688x1520(4MP)
FPS 15
CBR
8192
For some reason, the driveway cam (IPC-T54IR-ZE-S3) , I get "Poor" for the link quality. I tried re-seating the connection and moving to another port but still the same. my installer had to terminate the remote end of all the cat6 cables prior to install and all othe others came up fine.
the HDDs came up fine on the NVR.
PTZ will be done next week and I ended up getting the in-ceiling bracket.
some night photos of the view I get out of the NVR.
reading some other posts, I ended up setting my encoding settings to all cameras to:
Coding strategy: General
Type: General
H.264
2688x1520(4MP)
FPS 15
CBR
8192
For some reason, the driveway cam (IPC-T54IR-ZE-S3) , I get "Poor" for the link quality. I tried re-seating the connection and moving to another port but still the same. my installer had to terminate the remote end of all the cat6 cables prior to install and all othe others came up fine.
Attachments

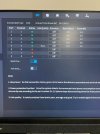
1- ignore the poor quality connection warning. It’s broken and does not work
2- the settings you have are baseline and primarily intended for BI which has a problem using higher bitrates and FPS
Use h.264.h , 10240 (for your 4MP cams) , CBR, and increase your FPS to 25-30.
You can always back off of that FPS if it causes issues, it’s not a still image factor simply aesthetics
Looks like a good start.
Now start testing at night with a person moving at various distances from the cameras. Each will be slightly different and require different setting tweaks.
Light is the #1 factor on nighttime image quality and the amount of it in each scene determines the needed tweaks
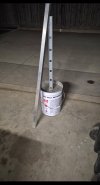
This is what my fence guy came up with for the lpr temp post.
My ideal mounting height is 2.5M because that’s where the cable is but I asked him to make it adjustable down to 2M in case 2.5M doesn’t work out and height is my problem.
As for the LPR camera itself this is how it would be orientated when flush against the brickwork, but I’m unsure if I can then rotate it so the lens is facing straight on and not sideways like how it is in the pic.
Attachments
Richard Chen
n3wb
I did a similar setup at my place — also had the pre-wiring done, which honestly makes life a lot easier. For the corners, I put in one of ACTi’s compact PTZs. Starts at 2.8mm with about 10x zoom, and what I like is the movement is smooth and the outdoor build feels solid. It’s been handy for scanning the street without needing multiple fixed cams. For the rest of the points, I’d just keep it consistent with the same brand domes/bullets plus their NVR so playback and management is straightforward.
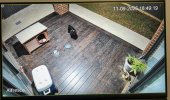
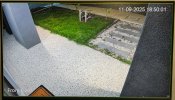
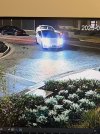
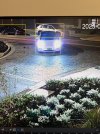
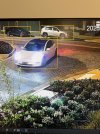
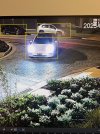
I've got the LPR camera up and this is what I'm getting currently. Photos taken with my iphone off what I see on the nvr. What settings can I dial in for night time ? the photo I took which is LPR3 or LPR5 looks like the ideal car location to get the plate. It might be possible to make that tree disappear if need be.
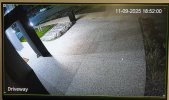
I also have the PTZ up and sharing a photo from that.
I also have the PTZ up and sharing a photo from that.
Attachments


^^^^
This
If you want to capture the majority of plates you’ll need to zoom in a bit more and increase your exposure speed. I typically run 1/1000 fixed at night.
As mentioned some pages back LPR requires some time and fine tuning. If I spend 1 hour adjusting and tuning a normal overview camera, I probably spend literally 10X that dialing in a dedicated LPR cam.
You have a lot of light it seems so your settings will be much different than mine.
You’re also trying to run color at night. And you might get away with it, but once you increase exposure to run faster and freeze the car motion, and eliminate the headlight glare, you may find you have to sacrifice the color at night. Most of us run B&W with IR at night
Last edited:
I've got the LPR camera up and this is what I'm getting currently. Photos taken with my iphone off what I see on the nvr. What settings can I dial in for night time ? the photo I took which is LPR3 or LPR5 looks like the ideal car location to get the plate. It might be possible to make that tree disappear if need be.
I also have the PTZ up and sharing a photo from that.
Are you logging into the NVR using a web browser on a PC/Laptop?
I’m directly on the NVR. My laptop has no Ethernet ports and my modems LAN ports aren’t working either.Are you logging into the NVR using a web browser on a PC/Laptop?
I’ll be getting a usb-c Ethernet adaptor tomorrow and plugging directly into the NVRs network port - will that work to access the cameras direct web GUI page?
I’m a couple of weeks off probably from installing a new home network and then I can get the NVR onto the network.