I am finished with the Reolink Track Mix POE installation. I want to share my experience. It might help others and it will definelty be improved upon.
My thanks to TonyR.
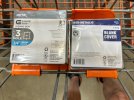
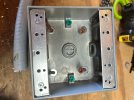
1. I originally bot the plastic junction box and cover. I realized that I needed to drill and hole in the face plate to allow for the TrackMix cable to pass through. Like most of my DIY projects I botch the first drilling process and retreated back to HD for a new face plate.
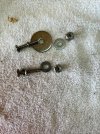
2. For the actual screws, washers and nuts I traveled to Ace Hardware. They are the place for screws etc. I bot stainless steel screws with locking washers locking nuts.
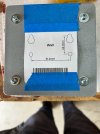
After this second attempt (using the template I copied) I drilled the correct holes for the camera on the face place. Please note I used a nail punch on each hole so my drill bit would not slip,
For extra strength I used washer on the screw side of the canera, So I had washers on the front side and back side of the face plate.
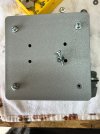
3. The junction box was installed using deckmate screws. I used small washers on the inside of the juction box for added strength.
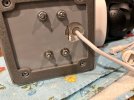
4. I had run the POE Cat 6 cable a couple months back. So now, with the help of my wife, we terminated both ends of the cables and tested them out.
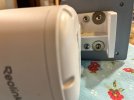
As an added test I attached the camera, and used the reolink iphone app and set it up. This went seamlessly, Thank-you Reolink.This was all done a ground level.
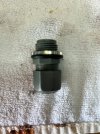
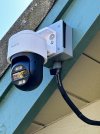
5. Please note that the camera has black electrical tape on it. This will be replaced by water proof sealant.
6. Here is a great youtube video on installation tips. It might hlep, I sure helped me.
I want to thank all of you for your help on this project. I could not have sucessfully finished it without you.
7. In conclusion, the camera is working well. We have had skunks in our front yard diging for grubs. Now with the help of the camera I have legal evidence of the critter. I have sentenced him the death. LOL
View attachment Front House_20251016044744_20251016044802_9527000J5FB7GRTZ_0..MP4