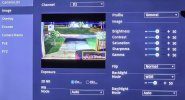
And do not set the camera settings in the NVR - do it in the camera GUI.
And for some other tips, in terms of getting the most out of the camera, here is my "standard" post that many use as a start for dialing in day and night that helps get the clean captures and help the camera recognize people and cars.
Start with:
H264
8192 bitrate
CBR
15FPS
15 iframes
Every field of view is different, but I have found you need contrast to usually be 6-8 higher than the brightness number at night.
We want the ability to freeze frame capture a clean image from the video at night, and that is only done with a shutter of 1/60 or faster. At night, default/auto may be on 1/12s shutter or worse to make the image bright.
In my opinion, shutter (exposure) and gain are the two most important parameters and then base the others off of it. Shutter is more important than FPS. It is the shutter speed that prevents motion blur, not FPS. 15 FPS is more than enough for surveillance cameras as we are not producing Hollywood movies. Match iframes to FPS. 15FPS is all that is usually needed.
Many people do not realize there is manual shutter that lets you adjust shutter and gain and a shutter priority that only lets you adjust shutter speed but not gain. The higher the gain, the bigger the noise and see-through ghosting start to appear because the noise is amplified. Most people select shutter priority and run a faster shutter than they should because it is likely being done at 100 gain, so it is actually defeating their purpose of a faster shutter.
Go into shutter settings and change to manual shutter and start with custom shutter as ms and change to 0-8.3ms and gain 0-50 (night) and 0-4ms exposure and 0-30 gain (day)for starters. Auto could have a shutter speed of 100ms or more with a gain at 100 and shutter priority could result in gain up at 100 which will contribute to significant ghosting and that blinding white you will get from the infrared or white light.
Now what you will notice immediately at night is that your image gets A LOT darker. That faster the shutter, the more light that is needed. But it is a balance. The nice bright night static image results in Casper blur and ghost during motion LOL. What do we want, a nice static image or a clean image when there is motion introduced to the scene?
In the daytime, if it is still too bright, then drop the 4ms down to 3ms then 2ms, etc. You have to play with it for your field of view.
Then at night, if it is too dark, then start adding ms to the time. Go to 10ms, 12ms, etc. until you find what you feel is acceptable as an image. Then have someone walk around and see if you can get a clean shot. Try not to go above 16.67ms (but certainly not above 30ms) as that tends to be the point where blur starts to occur. Conversely, if it is still bright, then drop down in time to get a faster shutter.
You can also adjust brightness and contrast to improve the image. But try not to go above 70 for anything and try to have contrast be at least 7-10 digits higher than brightness.
You can also add some gain to brighten the image - but the higher the gain, the more ghosting you get. Some cameras can go to 70 or so before it is an issue and some can't go over 50.
But adjusting those two settings will have the biggest impact. The next one is noise reduction. Want to keep that as low as possible. Depending on the amount of light you have, you might be able to get down to 40 or so at night (again camera dependent) and 20-30 during the day, but take it as low as you can before it gets too noisy. Again this one is a balance as well. Too smooth and no noise can result in soft images and contribute to blur.
Do not use backlight features until you have exhausted every other parameter setting. And if you do have to use backlight, take it down as low as possible.
After every setting adjustment, have someone walk around outside and see if you can freeze-frame to get a clean image. If not, keep changing until you do. Clean motion pictures are what we are after, not a clean static image.