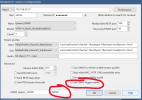
I struggled for 10+ hours to get IVS from my Empiretech/Dahua camera to feed properly into Blue Iris. I finally figured out the issue, so I thought I would share it here. The key thing I missed (and didn't see in the dozen or so other forum threads) was that I needed to add "00000" to the ONVIF source text box in the Network IP camera configuration menu - see step 3 below. I also had to add my own "listen for" rule to the ONVIF/camera events configuration menu - see step 7
Goal: use the camera's IVS features (not "motion detection" or "smart motion detection") to determine when a car passes my area of interest. I wanted to reduce CPU usage on my Blue Iris computer. I was also having issues with missed detections with Blue Iris motion detection (probably my fault - didn't spend much time configuring it).
Camera: EmpireTech IPC-B52IR-Z12E-S2
Camera Firmware: V3.142.0000000.4.R, Build Date: 2024-12-21
Blue Iris Version: 5.9.9.67
Here are the steps I followed from scratch. I probably missed something, but here goes:
1. Add new camera. Update username / password and change Discovery/ONVIF port to correct one before hitting "Find/inspect...". In my case, I changed the port to "80" to match the HTTP port from my camera.
2. Select the correct IP address from the "Find/inspect..." menu.
3. Check the box for "Get ONVIF trigger events". Also change the second "ONVIF source" text box to "00000" - see attached
Note: Changing the second text box value to "00000" was the important step that I missed for 10 hours. No idea what it means.
4. I made some other changes that shouldn't affect this, such as max frame rate, hardware decoding.
5. Motion/Trigger Tab: uncheck "Enable motion sensor" and check "ONVIF/camera events".
6. Click "OK" at bottom of window to configure the camera. This will ungrey the "ONVIF/camera events Configure..." button.
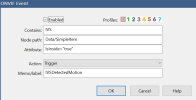
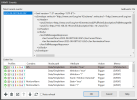
7. Motion/Trigger Tab: in ONVIF/camera events configure window: add a new rule:
contains: IVS
node path: Data/SimpleItem
Attribute: IsInside="true"
8. Alert Tab: I didn't have to change anything, but I did verify that "ONVIF" and "External" checkboxes were checked in the "Trigger sources and zones" section.
Empiretech/Dahua Camera Settings:
-Motion detection and Smart Motion Detection off
-IVS Rule enabled "Alarm-out Port"
-ONVIF enabled (network>basic services)
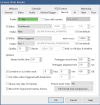
Other feature worth mentioning: In the Record tab, you can tell Blue Iris to save a JPEG to a specific folder. In this case, I save it to my AUX 1 folder, which I defined in the Blue Iris (not specific camera) settings, storage tab. This results in me having a folder with only the license plate captures. To avoid cluttering my database feed with these cars, I also unchecked "Add to the alert list" in the camera's Alert tab.
I'm still fine tuning everything, but so far extremely happy with my Z12 camera. It is much better than my $60 5MP reolink and amcrest cameras.
Thanks to the countless other forum threads on here - couldn't have gotten this far without this forum.
Attachments
-
 BI_IP Settings After ONVIF Changes.png72.4 KB · Views: 0
 -
 BI_IVS Rule detail.png20.2 KB · Views: 0
 -
 BI_IVS Rules.png91.5 KB · Views: 0
 -
 BI_JPEG record settings.png53 KB · Views: 0
 -
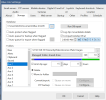 BI_Settings Storage.png60.4 KB · Views: 0
 -
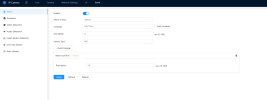 Camera_alarm rule.png38.3 KB · Views: 0
 -
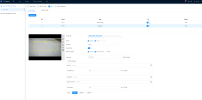 Camera_IVS Rules.png254 KB · Views: 0
 -
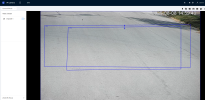 Camera_live view.png3 MB · Views: 0
